Getting Started Guide
In this guide we will show you how to get started using APS, and test that the basic features are working.
1. Download, installation and licence
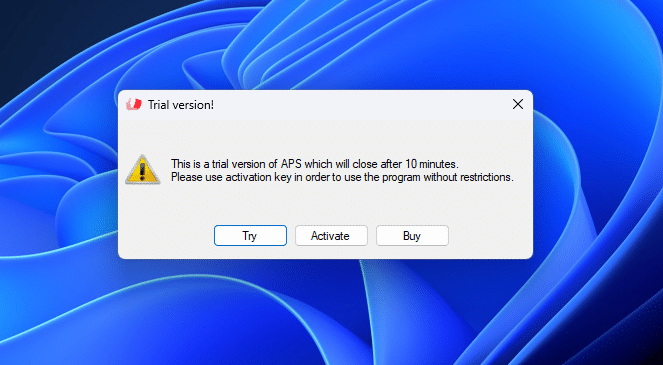
Download and run the installation-file. The first time you open the program, you will be asked to activate. If you have bought a licence, then push “activate”, and paste your licence into the activation field.
When you open the program, the main menu should open, or you will find the program icon in the taskbar (Windows) or dock (Mac).
(please note: APS also has an option for hiding the program-icon from the taskbar/dock, and instead place it in the system tray/menu bar. If you cant find the program-icon, please look here,)
Mac only: Give app-permissions
APS can remote-control presentation programs, take screenshots, and access your file-system. In order to use APS without restrictions on mac computers, you need to give APS several security-permissions
Read more
Auto Presentation Switcher needs specific macOS permissions to function properly and automate your presentations.
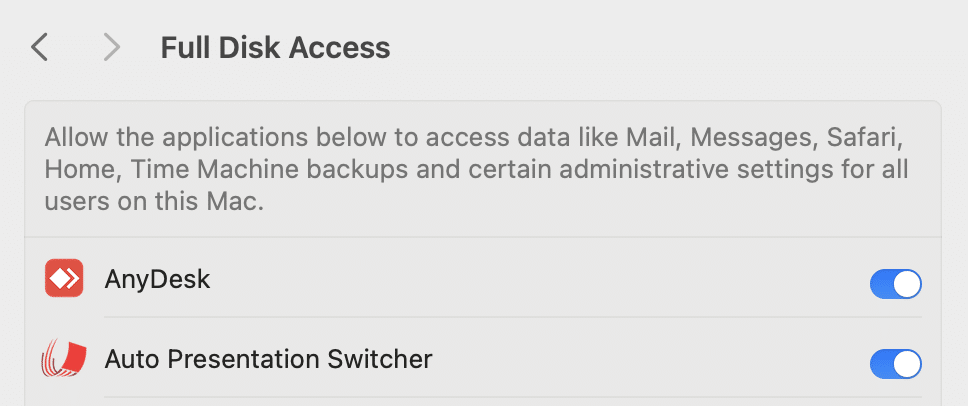
- Disc Access (Files & Folders or Full Disk Access)
The app monitors presentation folders to detect new or updated files and open them automatically. This requires direct access to the file system. - Accessibility
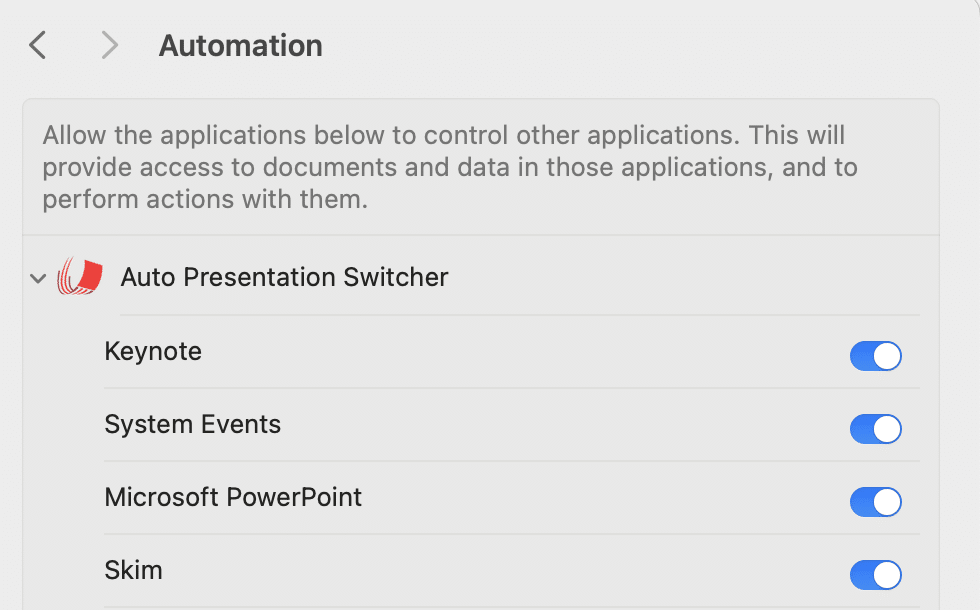
This permission allows the app to control presentation software (PowerPoint, Keynote, Skim, Adobe Acrobat Pro) by simulating user actions like advancing slides or opening files. - Automation
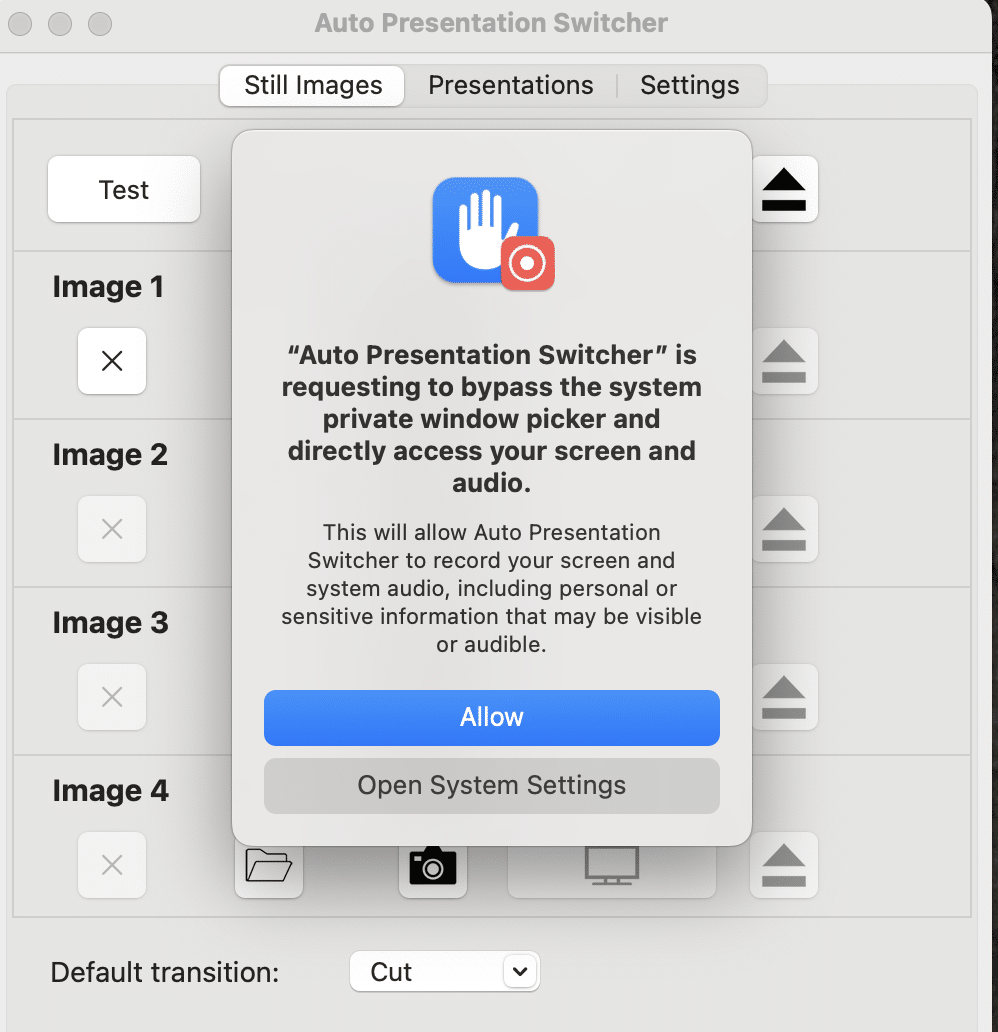
The app communicates with other applications to open and control presentations. macOS requires explicit permission for controlling PowerPoint, Keynote, Skim, Adobe Acrobat Pro, and System Events. - Screen & System Audio Recording
Auto Presentation Switcher can take screenshots and display them. This is used for the “Seamless Switching” method, and the “Capture” command in Companion.
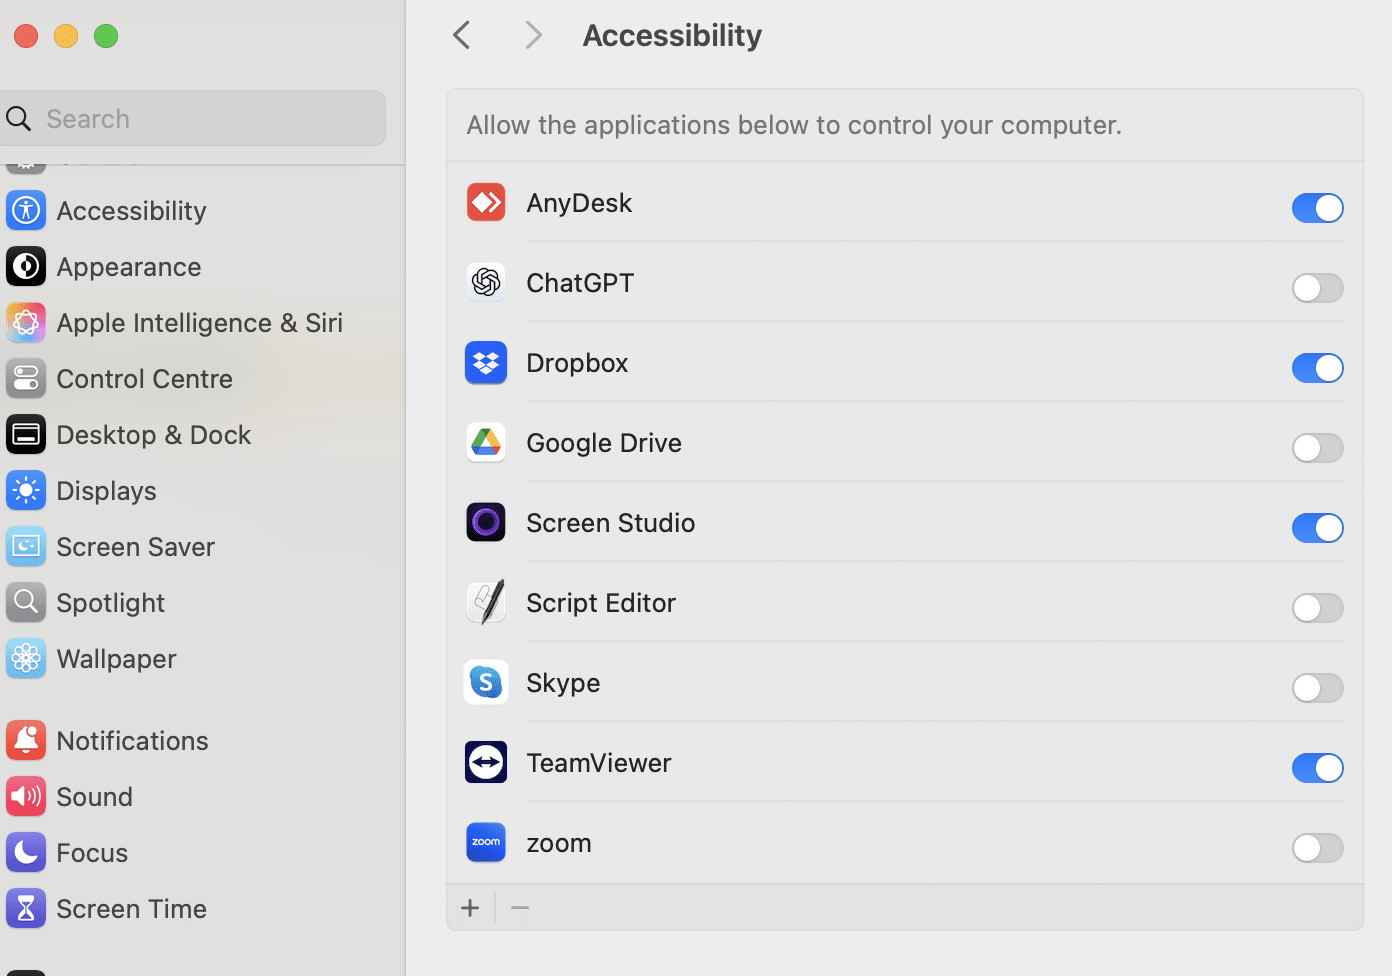
Accessibility
When you open the program for the first time, this popup-window will appear:

Push the button to open System Preferences.
Here you will need to do the following:
-Click the lock to make changes. Enter password- Push the + sign and add Auto Presentation Switcher from the file-menu
– If this is successful then you will be asked to re-open the program. This will be done automatically after you accept.
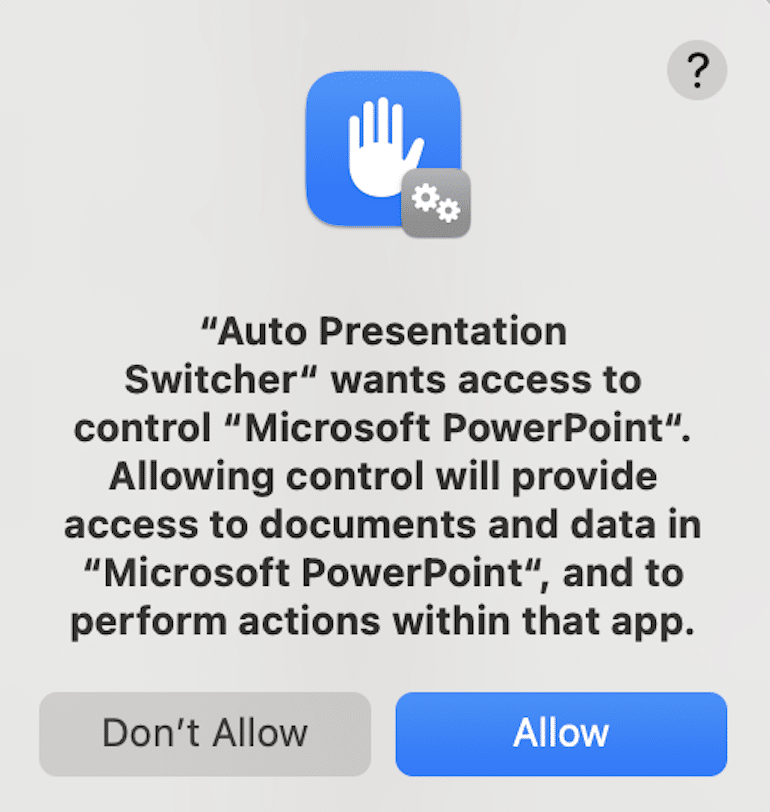
Automation
The first time APS opens a program for presentations, you will be prompted to allow automations. You will need to allow this for APS to control the presentation-programs.
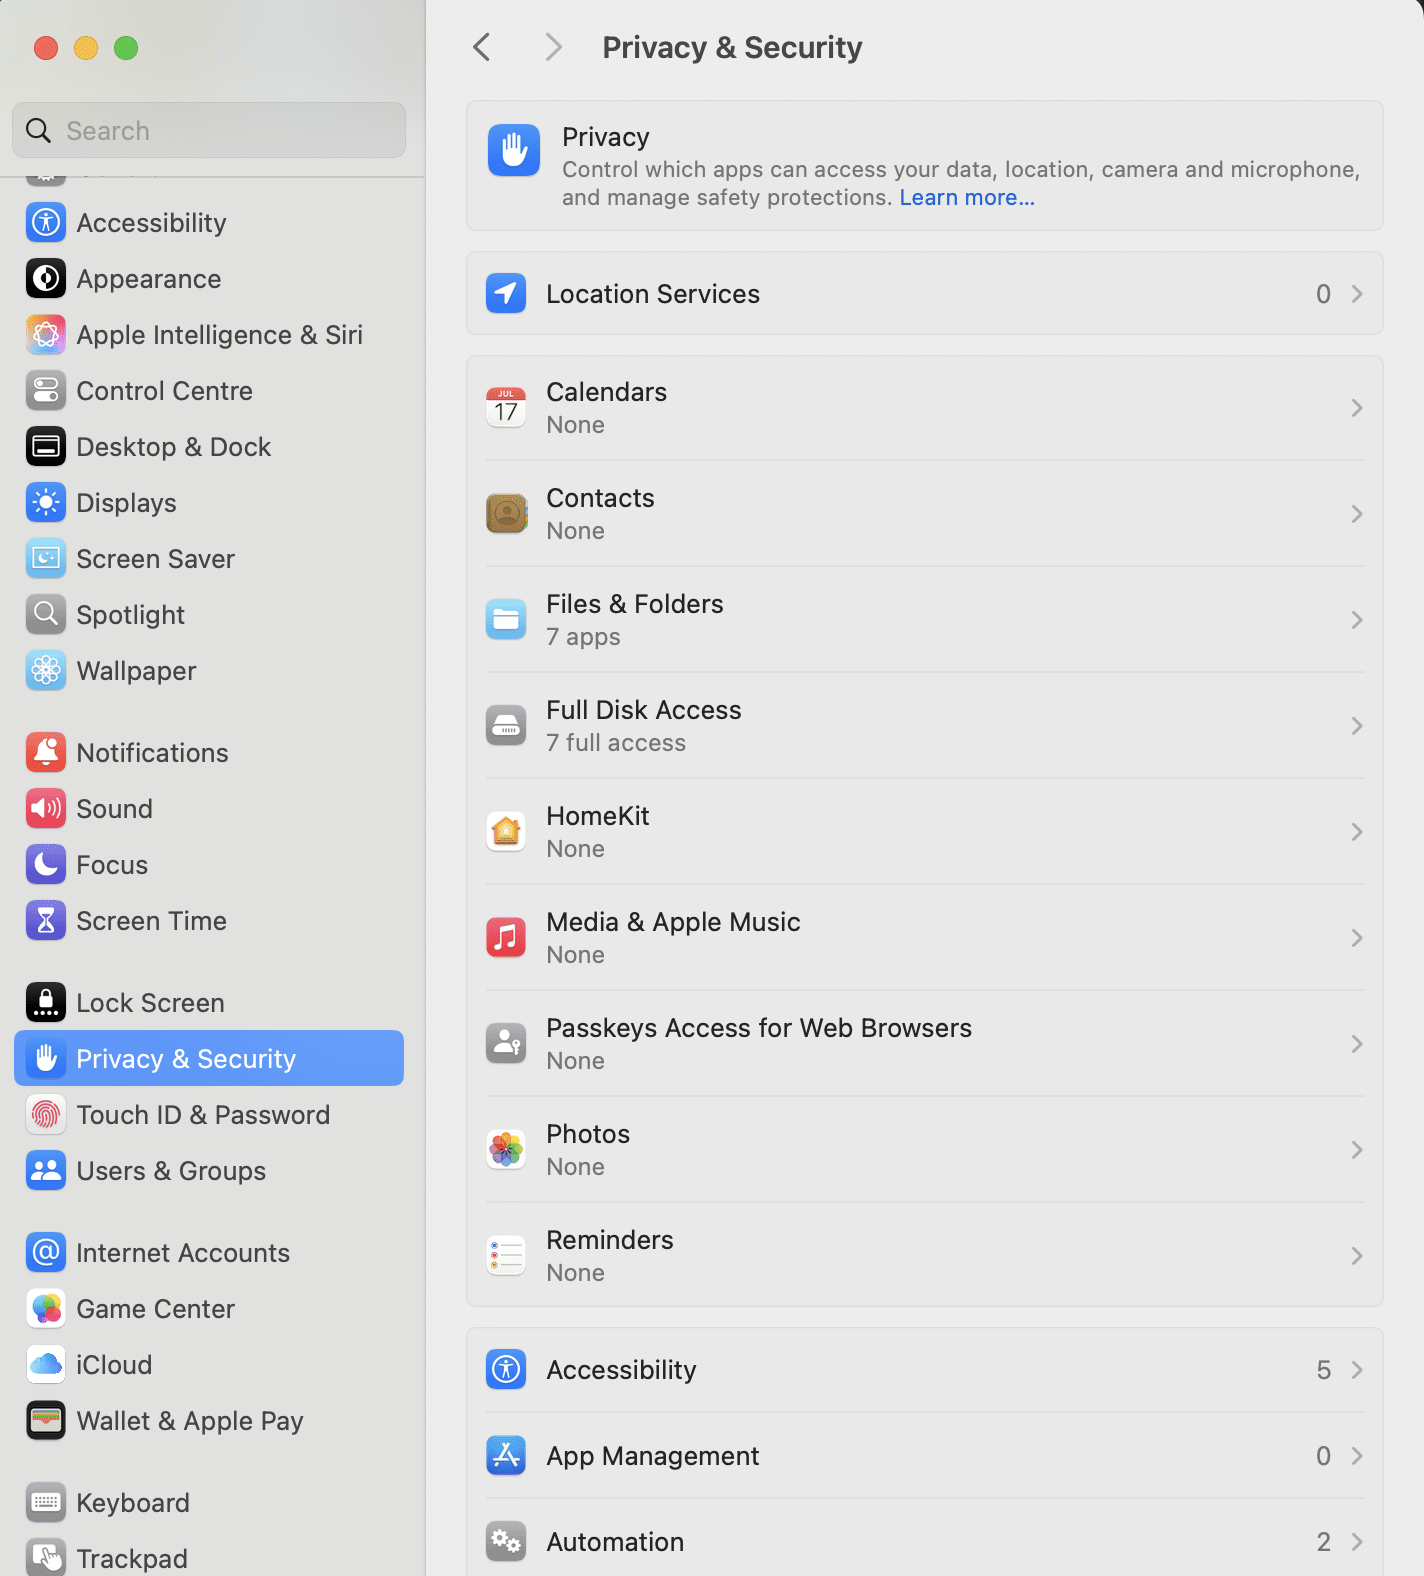
If you push “don’t allow”, you can always enable this permission later from the Privacy and Security settings:
Files and folders
Whenever APS tries to access a file in a new location, you will be prompted to
APS Mac wants to access files on your Mac.
You can also give APS permissions manually from the security & privacy menu. Choose which folders you want to use with APS, or simply give APS access to all with the option “Full Disc Access”:
Screen recording
The first time you take to take the screenshot, or try to switch presentations seamlessly, you will be prompted to allow screen recordings:
Go to System Settings to change these permissions, similarly to how you do with Accessibility. Note that you need to restart APS for these changes to take effect.
Updating APS and permission settings
! Important about updating: You might also need to set this permission again when upgrading from earlier versions. After every update, we recommend that you test basic features of the program. If you get problems with the presentation-commands after updating, try to manually set the permissions again, by deleting previous permissions for APS and choose the new version of the app.
We are sorry for the inconvenience.
2. Install presentation software
APS can control different presentation-software:
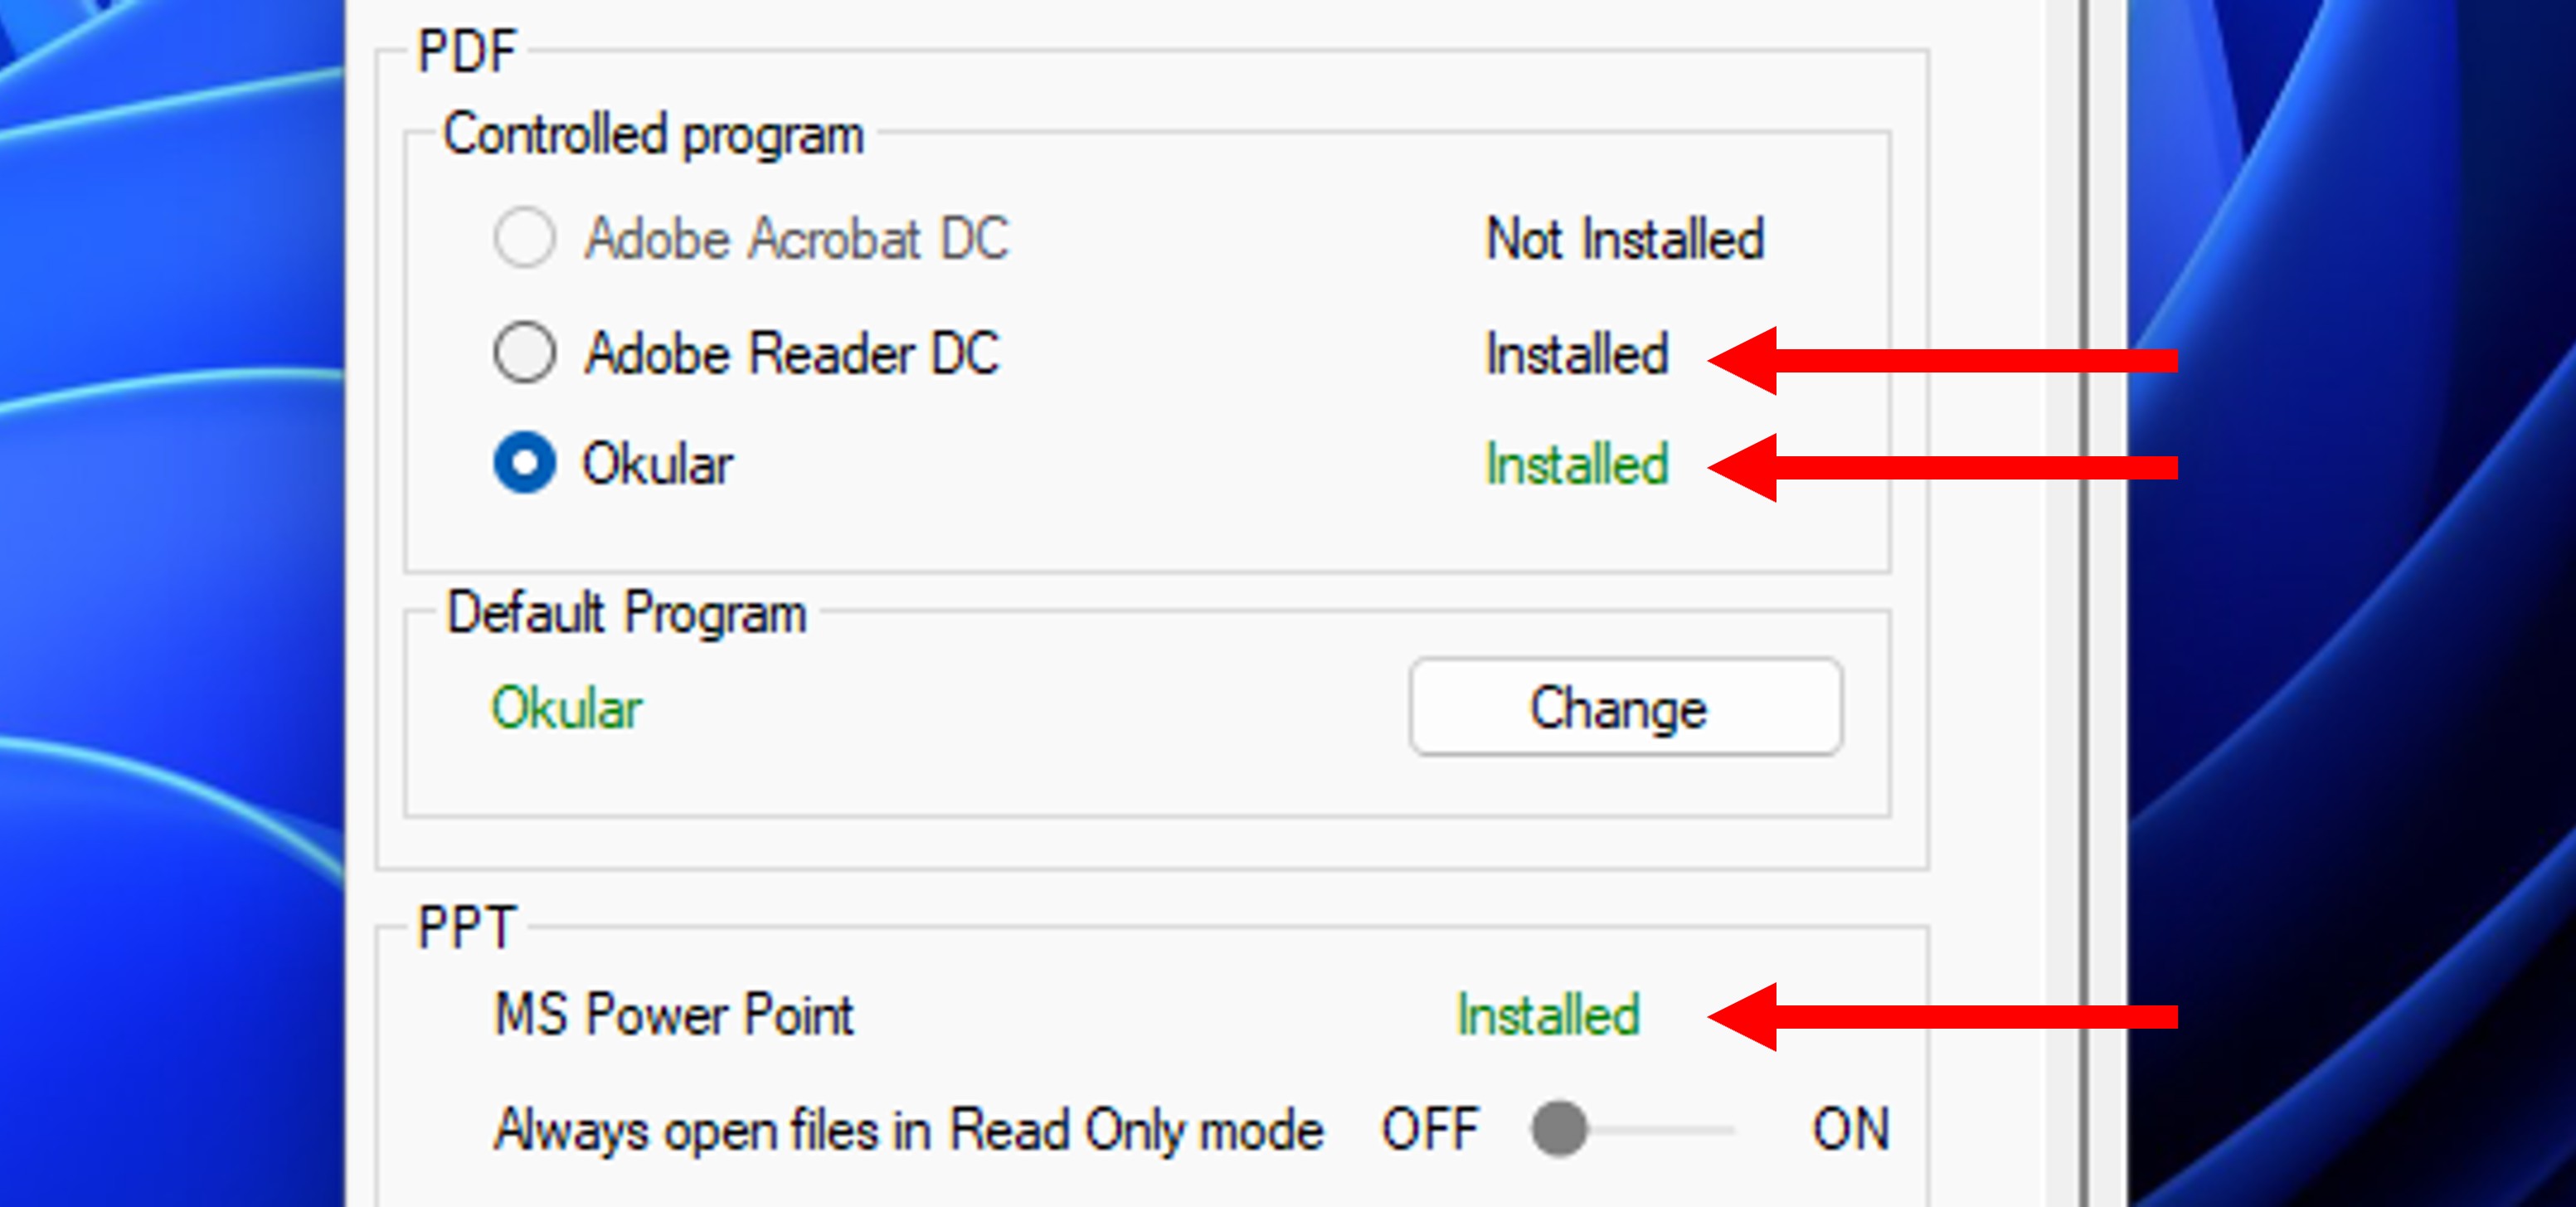
– Microsoft PowerPoint (Mac/PC
– Adobe Acrobat Pro (Mac/PC)
– Keynote (Mac only)
– Skim PDF (Mac only)
– Okular PDF (PC only)
Download and install the presentation-software you want to use with APS. Its also a good idea to test the software without APS to check that everything is working properly.
From the APS menu, you can see which compatible presentation-software is installed.
PC recommended step: Turn off PowerPoint protected view
Protected view in PowerPoint for Windows is meant to protect you from malware in presentations that you recieve. But this feature also prevents APS to control PowerPoint the way we want to with APS. Therefore its recommended that you turn off this setting.
Learn how to turn off PowerPoint protected view
This video should tell you everything you need to know:
3. Test presentations with the slot commands

To verify that APS can control presentations, you can use the slot-presentations from the user-interface. From the APS menu, go to “Presentations” and “Slots”. Drag & drop one of your presentations to the folder-icon on one of the available slots. Then when you push on the filename-button to the right, the presentation should display in fullscreen.
4. Test images and screenshots
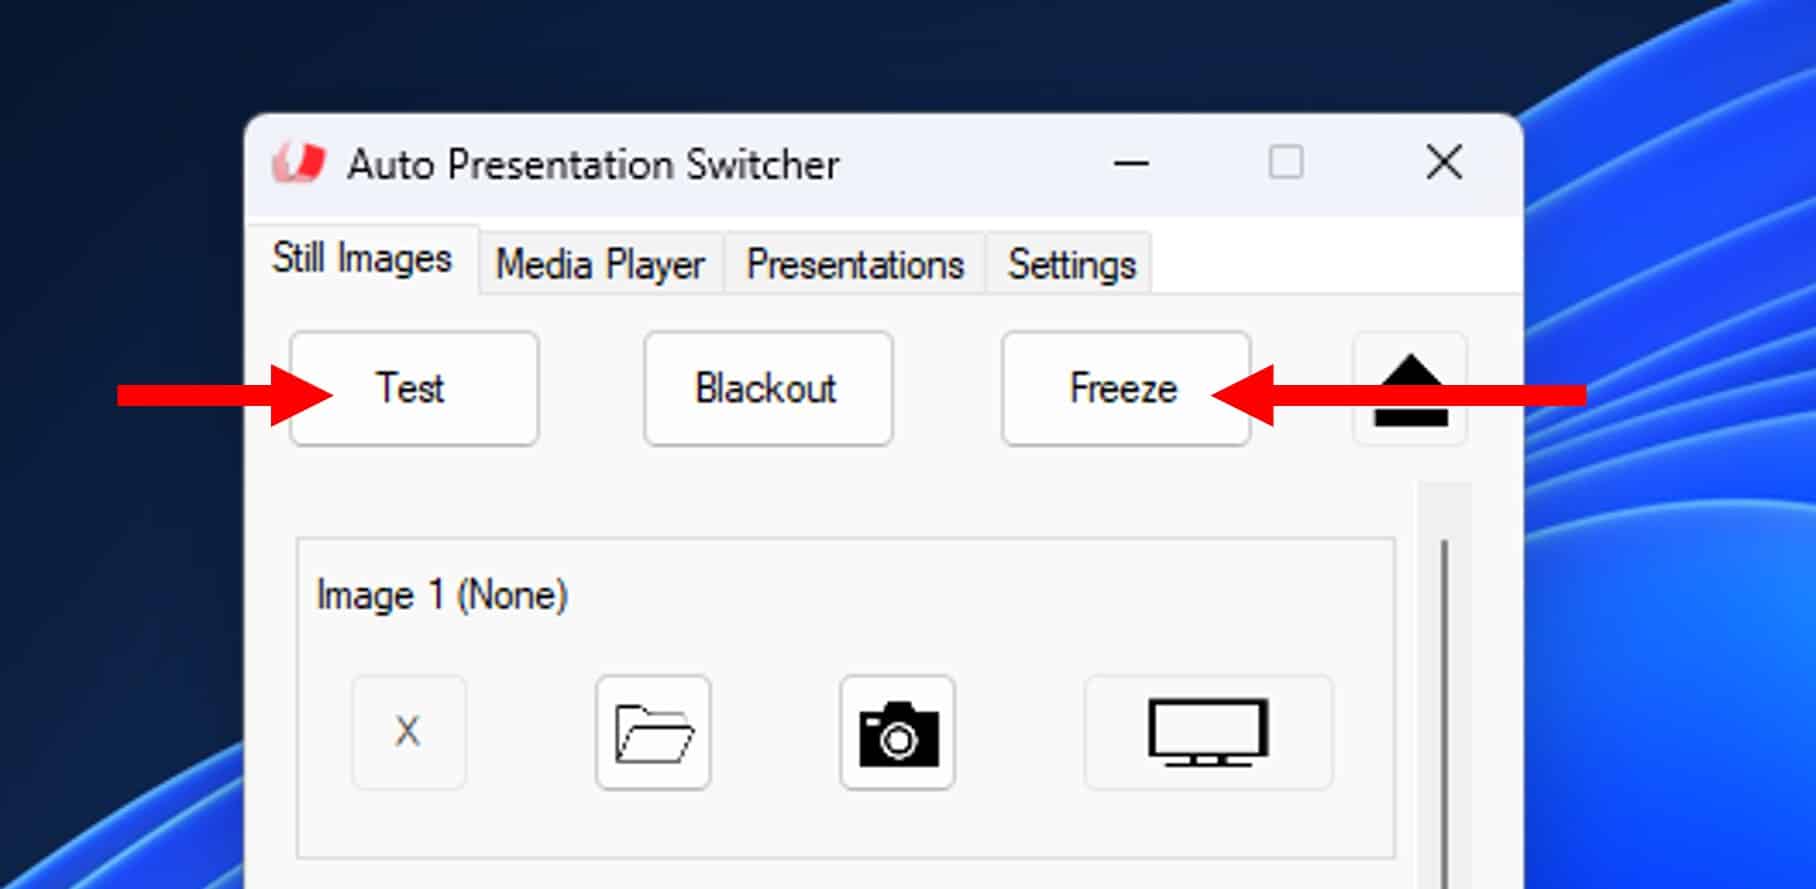
Connect to an external display, and set this display as extended. Now, as default, APS should display all images, screenshots and videos(PC) on the external display.
Next, go to the “images” tab in the menu, and push the “Test” button. This will display a rainbow test-image on the external display. Push the button again to exit.
You can also try the “freeze” button that will take a screenshot and display it. While the “freeze” is on, the screenshot-image should cover the display, so you wont see when you open a new PowerPoint presentation. Exit the freeze to return back to normal.
PC: Test the media player
The media-player for the Windows version of APS allows you to play videos, audio-files and images on the same display as used for the still-images. Testing this feature is similar to how you display a still-image, except for one additional step: you need to select a video by loading it, then use the “Play” button to start the playback.
1. Drag and drop a video-file to the file-icon for an available slot
2. Select and load the file by pushing the load-icon on the slot
3. Start playback with the play-button
Playback should now start on the external display.